


So I am sure we have all had some frustrations with food storage containers at one point or another. My food storage container cabinet was a stinkin’ hot mess, so I decided to get a little organized. I decided to combine a couple of different methods I have seen used before. Most of these food storage container organization options can be found at a dollar store and are a great way to get it together! With a file organizer, a dish dry rack, and a bin you too can get your food storage containers in order!


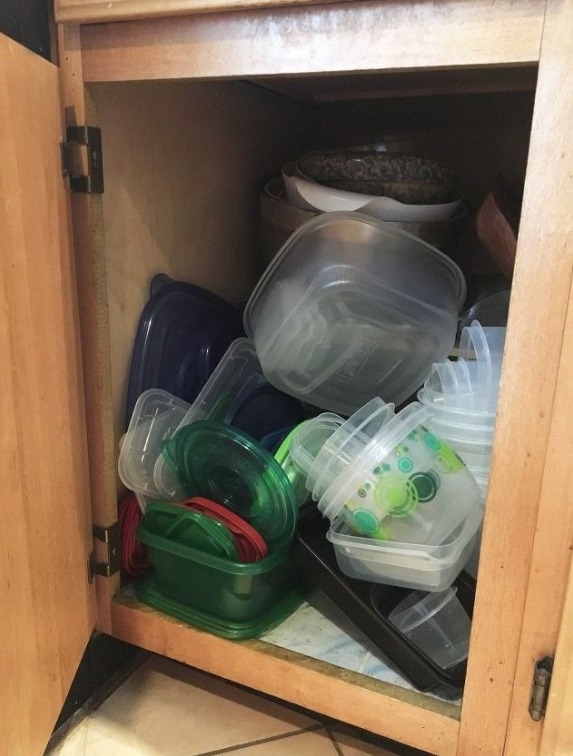
Guys… this seriously wasn’t staged… How sad is this madness? In my defense the lids were more organized a couple days ago, but things got moved around when I needed a bin in the back, and, well, there you have it… madness! Clearly this project was done out of necessity.


SUPPLIES:
-Plastic Bin
–Dish Drying Rack
-Office Organizer
-Drill
-2-3 Screws
To continue Reading, Please Open The Next Page .

STEP 1:
Match Up All of Your food storage containers
Make sure all the food storage containers you have has its matching lid… if you are anything like me you will have some random extras that can be tossed out. Some lids I found I had literally never seen. It’s a little ridiculous.

STEP 2:
Put Your Lids in the Drying Rack
Once you make sure all of your food storage containers are worth keeping, it is time to start organizing! First, grab your dish drying rack. Take all of your small lids and tuck them into the cutlery drying pocket.


STEP 3:
Stack Your Food Storage Containers in Bins
Now grab your bin(s) and stack your food storage containers in the most organized manner you can, and place them in the bin so they fit nicely but also in a neat manner.
To continue Reading, Please Open The Next Page.


STEP 4:
Place the Rack and Bin into Your Cabinet
Now tuck your bin and dish drying rack back into the cabinet in whichever order you find fitting. I live in an apartment in Brooklyn, so I don’t have a ton of cabinet space to spread these out as nicely as I would like, but this is already SOOOO much better than what I had going on.


STEP 5:
Drill Your Folder Organizer Onto Your Cabinet Door
Now grab your folder organizer and a drill (and a couple screws) and secure it to the door, making sure there is clearance for the door to close without the bin hitting the items inside the cabinet.
Once it is secured in place, fill it with any extra or strange shaped lids that didn’t fit in the dish drying rack.

Look at all that beauty! I am seriously so pumped at this simple and cheap fix!

Of course you could just use several bins to store both lids and containers, but I kind of like that each lid has it’s own little space.
Materials I used for this project:


As you can see there is plenty of clearance for the door to close with the desk organizer attached.
Materials I used for this project:
- Plastic Bin (Ikea)
- Dish Drying Rack (Dollar Tree)
- Desk Organizer (Ikea)
- Dewalt Drill (Lowe’s)
- Short Screws from Fixa Kit (Ikea)
Source: hometalk.com