In just a few steps, you can transform not only a painted porch swing, but any outdoor painted furniture to a coastal driftwood gray finish like you see in the Pottery Barn or Restoration Hardware catalogs!
It’s any easy 3 layer paint process that will completely makeover your outdoor furniture.

Outdoor Driftwood Paint Finish First
I must disclose that I can only say this paint finish is safe for a covered area like my front porch. My best guess is this will work on more exposed furniture because the base layer is an exterior paint.
To keep my furniture clean, it’s hosed down 2 to 3 times per month and so far the porch swing finish is holding strong with regular use and upkeep after 9 months and through the winter.
In order to understand how to achieve this finish, I’ll detail the layers you will be applying.
The inspiration for this finish was a piece of natural driftwood that doesn’t have much of a grain pattern to it.

Layers of Paint
Base Color
Custom Color Wash
Dry Brushed Antiquing Glaze
Continue to the Next Page …
Each layer only took about 30 minutes, so not a lot of time to devote to get the driftwood gray finish! Just the dry time will slow down the process.
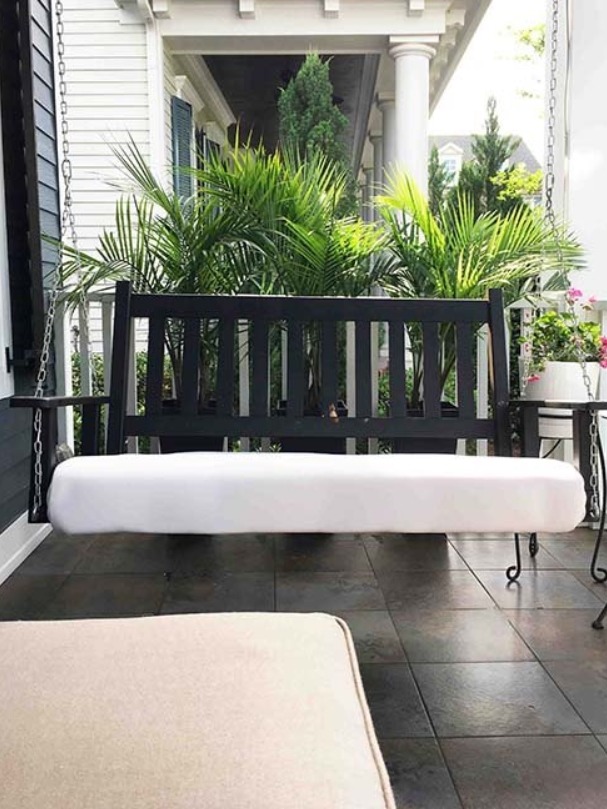
Here is what the porch swing looked like before the paint makeover. The black paint was faded after 8 years of use and starting to peel.
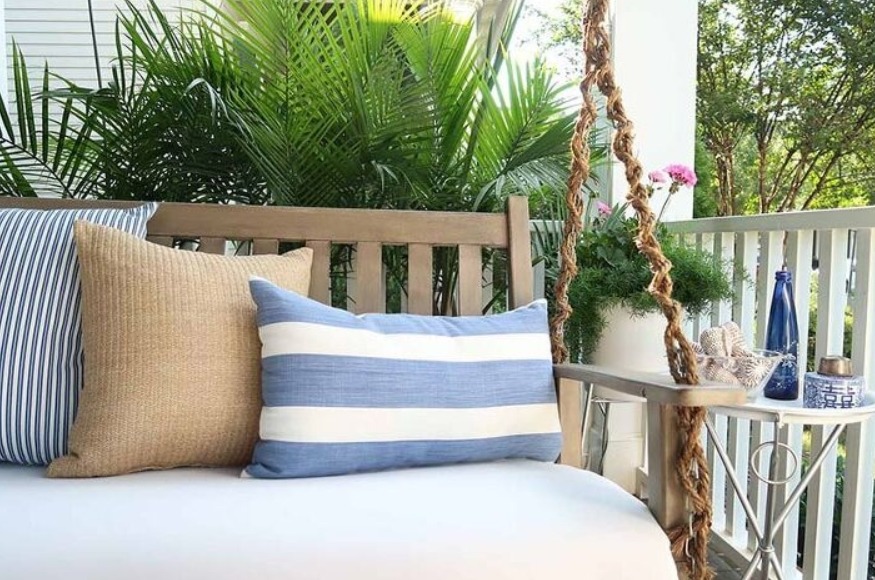
If you like the upholstered seat, it was an easy DIY upgrade.

How-To Create the Outdoor Driftwood Gray Finish
Make sure you pick a time where it won’t rain for a couple of days. There are overnight dry times in between coats and you don’t want the rain to ruin your hard work!
Supplies
Wooster Paint Brush
Quart Valspar Duramax Exterior Paint in Ivory Brown 6006-1C / Satin Finish
Water
Rags – I find old cut up t-shirts are the best
Find Grit Sanding Sponge
Antiquing Glaze
Custom Color Wash Instructions
Step 1
If the old paint finish on the furniture or swing is peeling, sand over those areas to remove excess paint. Wipe down with a damp rag to remove ALL sanding dust.
Step 2
Apply base coat of paint. Because Duramax paint is SO thick (spans a 1/4 inch gap) I was able to apply only one coat!
If you need or want to apply 2 coats, allow the 1st coat to dry overnight before applying the 2nd coat.
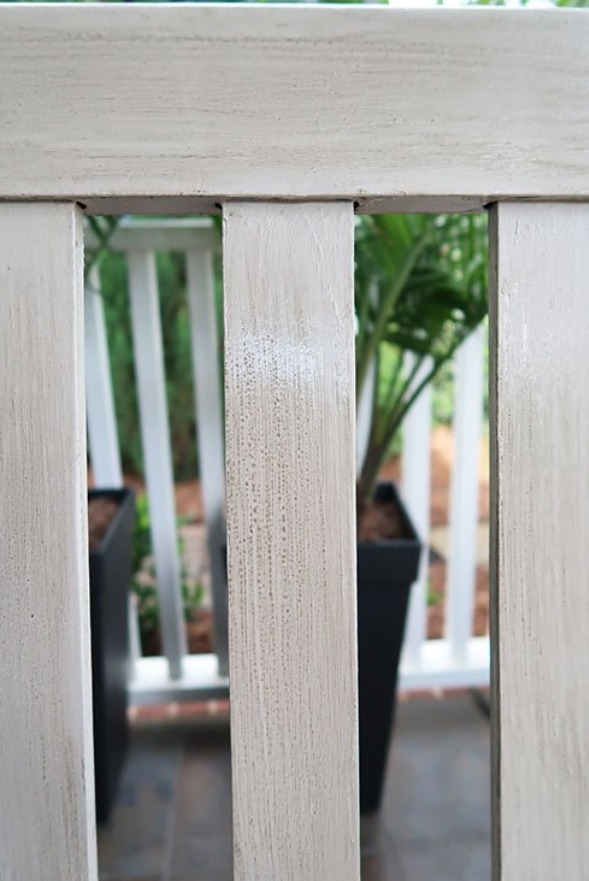
In my situation, I had to mask off the upholstered seat with garbage bags. This is what the Ivory Brown base coat looked like, before the color wash.

Continue to the Next Page …
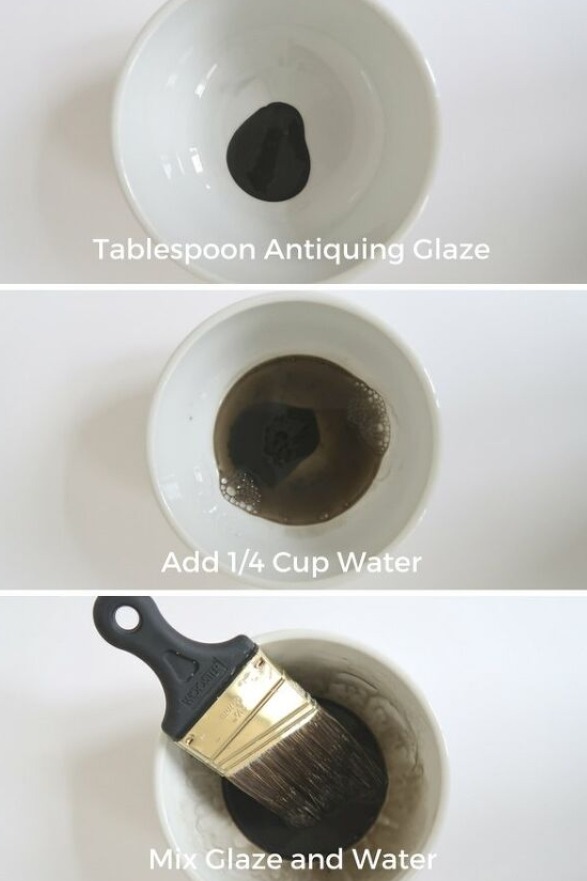
Step 3
Mix the antiquing glaze with water as shown.
Step 4
With your paint brush, layer on the custom color wash working in sections top to bottom and side to side.
Make sure to run the brush with the direction of the wood: horizontal and vertical. You can see my brush strokes below.

Let the wash sit for about 5 minutes per section and RUB into the paint using your rag.
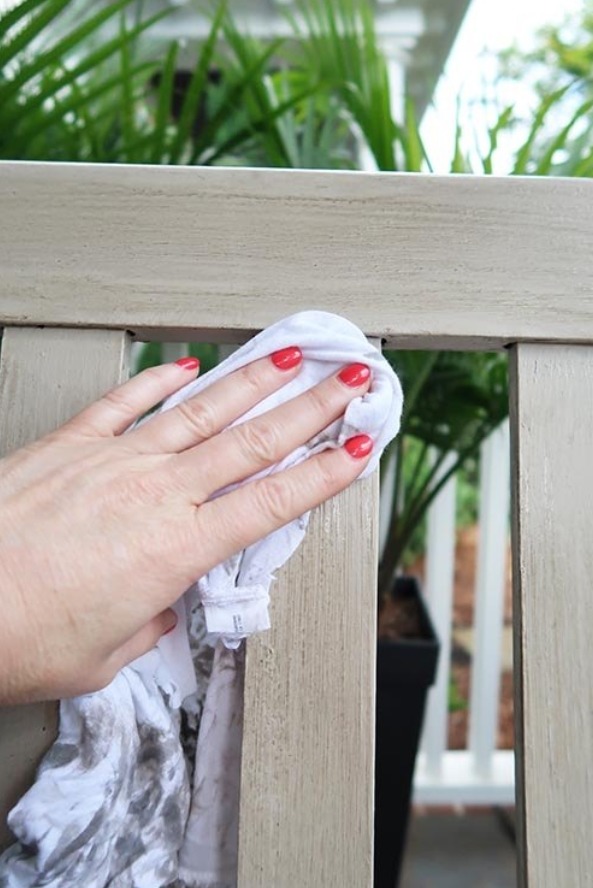

Work the paint into all of the crevices of the paint. You want to enhance the texture and brush strokes.
Let the the wash dry overnight!

Antiquing Glaze Dry Brush Instructions
You will now become an artist! This is called a DRY BRUSH technique because you barely have paint on your brush.
I’d suggest first practicing on a piece of cardboard first, so you get the feel of it. I’m sure you have cardboard around like I do from all of those Amazon deliveries!
Continue to the Next Page …
Step 1
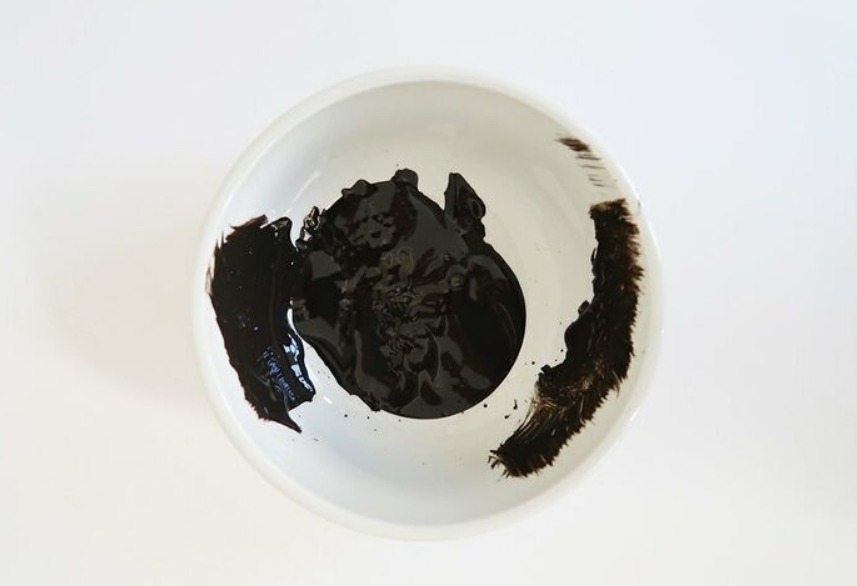
Fill the bottom of a wide mouthed bowl with antiquing glaze. DO NOT ADD WATER.
Dip just the tips of your brush into the glaze and blot on the sides of the bowl.
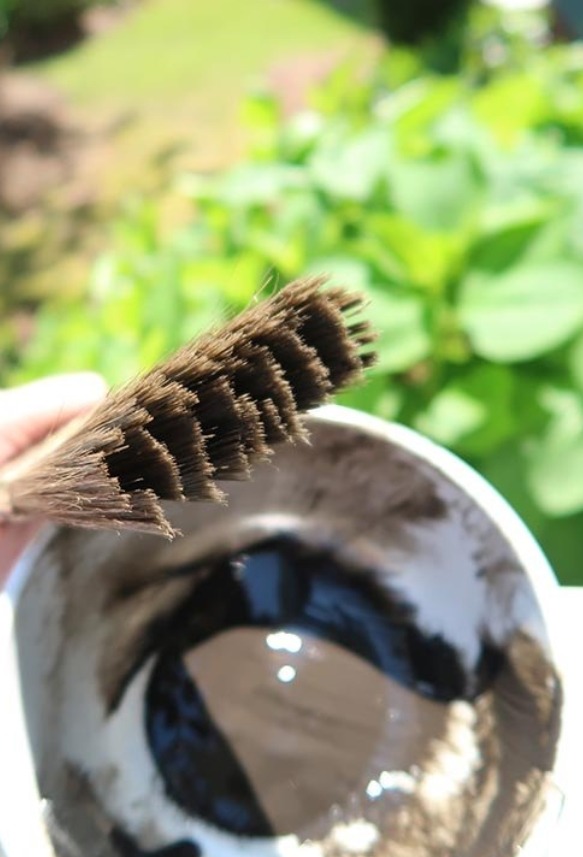

I’m going to show you a mid point in the process and what my brush looked like.
When I say very little glaze I mean it and your brush should fan out like this, from working the glaze back and forth on the wood.
You can see I was blotting the brush every time I added glaze on the side of the bowl.

Step 2
Work your brush back and forth, back and forth in the direction of the wood: horizontal or vertical to create lines.
Keep working an area until there isn’t glaze coming off of the brush and you need to re-load it with glaze.
Try to avoid overlapping!
I worked the horizontal sections first trying to avoid the vertical slats. Make sure you get ALL surfaces. I did overlap on edges and left it because I liked the look!
If you overlap, luckily glaze is forgiving and you can wipe it off with a damp paper towel before it dries.

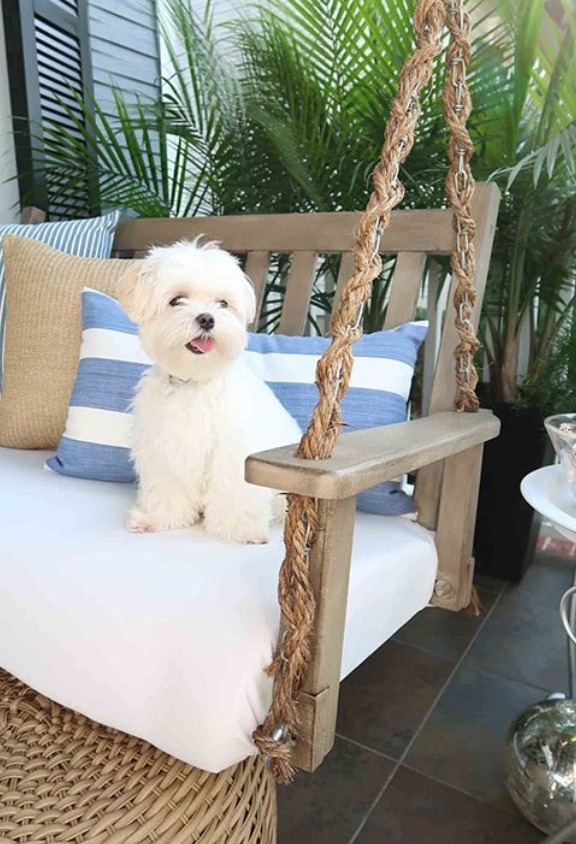
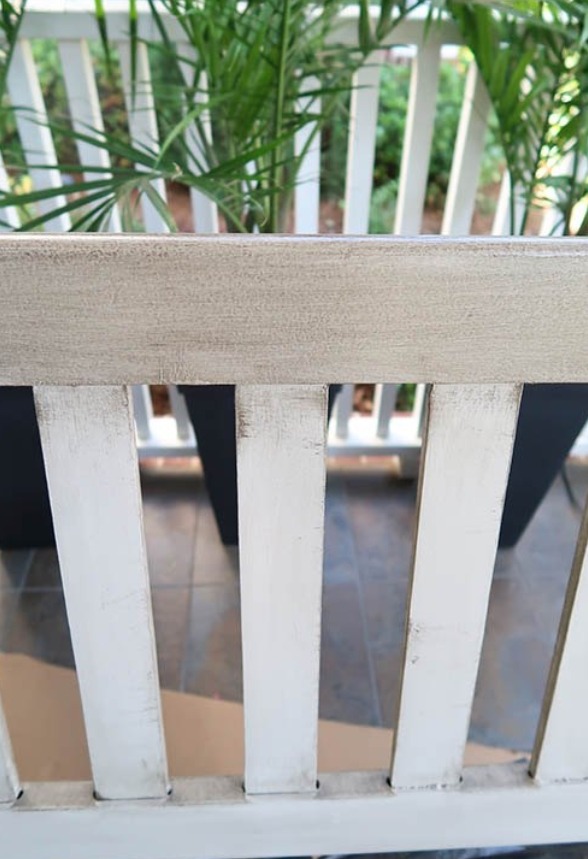
Here is a close up of the final driftwood gray finish!
Wait for it to dry overnight, before adding pillows or cushions so the finish is as hard as possible!
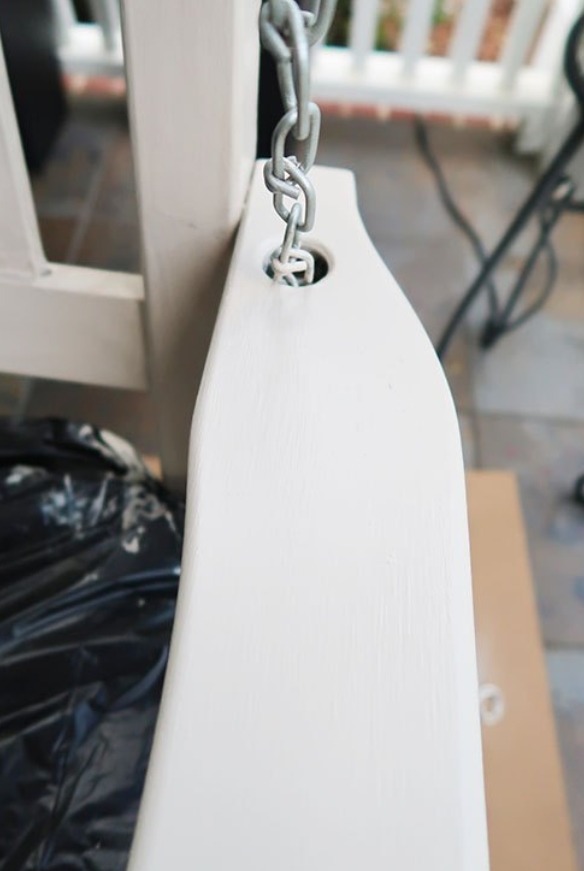
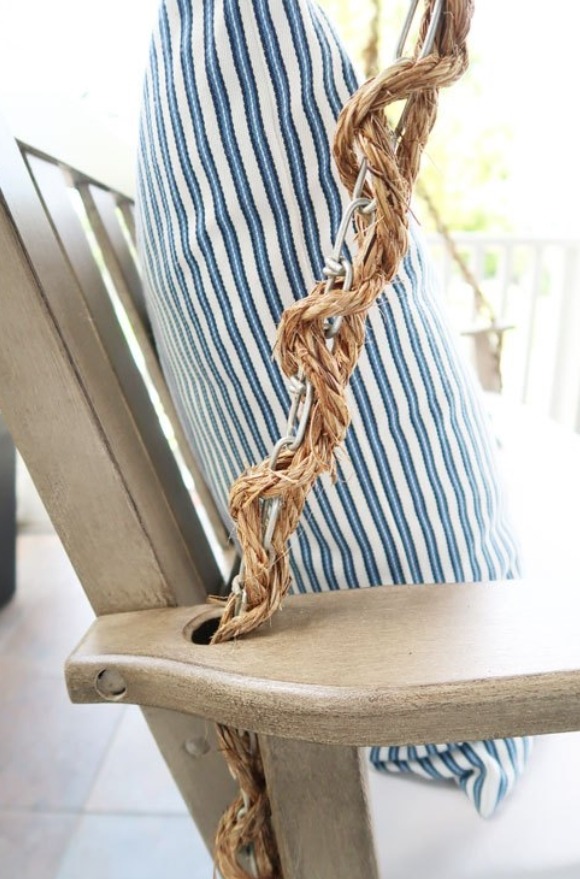
You can see I couldn’t get into the hole where the chain is, but it doesn’t hurt the overall effect.