


Easy No Knead Yeast Rolls – The no knead bread craze reached a frenzy a few years ago. I never really bought into the idea because by kneading the dough you’re actually developing the gluten in the flour which is a very important step in basic bread making. But, as I looked more closely at some of the recipes out there from Martha Stewart and beyond, my curiosity was peaked, and I wondered if it would really work.
So, this recipe is my own version after reading through a multitude of recipes available on this subject. And, it truly is easy, and requires no special equipment. After developing this recipe, what can I say, I’m a “no knead” believer now.
Cook’s note:
- To make the rolls in advance:
- After forming the dough into rolls, cover with a damp cloth or plastic wrap sprayed with cooking spray and refrigerate overnight, if desired.
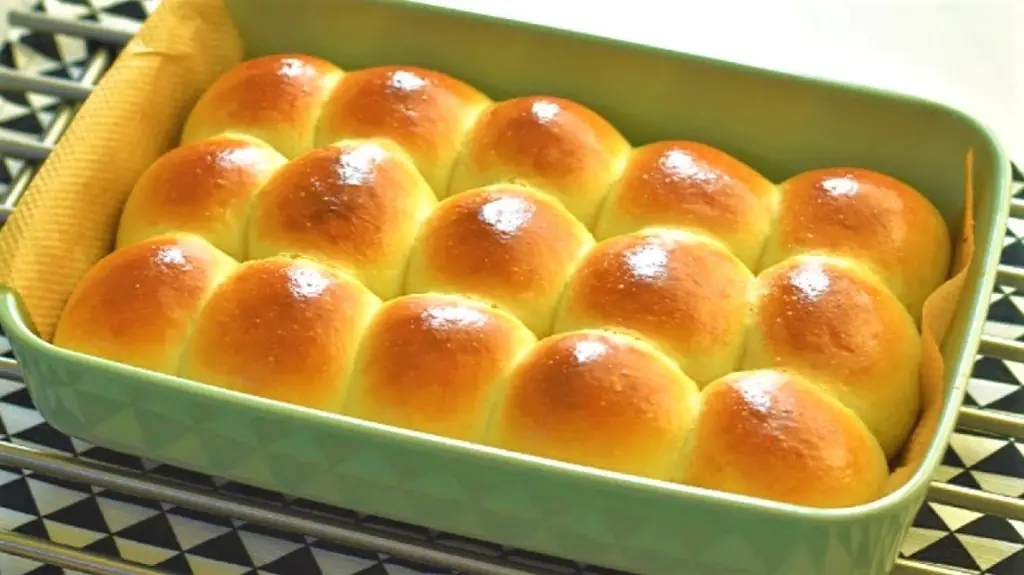
- Uncover, brush with melted butter just before baking at 400°F for 20-22 minutes until golden. The rolls will continue to slowly rise even in the refrigerator.
INGREDIENTS
- 2 [1/4 oz] packets rapid rise yeast [such as Fleischmann’s]
- ¼ cup granulated sugar, plus 1 tsp
To Find Out All The Yummy Ingredients And The Step By Step Directions To Follow for this Delicious recipes,Go to the next page.
INGREDIENTS
- 2 [1/4 oz] packets rapid rise yeast [such as Fleischmann’s]
- ¼ cup granulated sugar, plus 1 tsp
- 1⅓ cup of lukewarm water or milk
- 4 cups all purpose flour
- 1 tsp salt
- 1 large egg
- 8 Tbsp butter, divided
INSTRUCTIONS
- In a measuring cup, dissolve both packets of yeast and 1 teaspoon of sugar in 1⅓ cup of lukewarm water. If you use hot water or milk, it will kill the yeast and the bread won’t rise. So, make sure the water is lukewarm not boiling.
- Let the yeast mixture sit on the counter for 5-7 minutes to allow the yeast to “bloom.” You’ll see bubbles and froth begin to gather on the top.
- In a medium size mixing bowl, sift together the flour, salt and sugar. Add the egg.
- After the yeast has developed, gradually add it to the dry ingredients in the bowl, along with 5 tablespoons of melted butter.
- Begin to blend the ingredients together, using a large spoon incorporating more liquid as you go. I used a silicone spatula, and the dough didn’t stick to it, making this task a lot easier.
- After incorporating all of the flour place into a buttered bowl, and cover it with a damp cloth.
- Allow the dough to sit in a warm, draft free place, covered for 1 hour to double.
- Use a 2 ounce ice cream scoop, lightly sprayed with cooking spray, to separate the dough into even portions after punching it down to release the air bubbles.
- Roll into a ball in your hands then arrange side by side, in a buttered non-stick metal baking pan. I used a 10-inch spring form pan.
- Melt the remaining 3 tablespoons of butter and using a pastry brush, lightly brush the tops. Reserve some of the melted butter to brush on the tops after the rolls come out of the oven, too.
- Cover with a damp cloth and allow the rolls to rise again until doubled. [about an hour] OR
- Bake them immediately
- To bake: Bake in a preheated 400°F oven for 20-22 minutes.
- Serve hot.
From: 1krecipes