


With Thanksgiving fast approaching, I want to share my mom’s Thanksgiving stuffing recipe with you.
She’s been making this for as long as I can remember and it’s one of the most anticipated dishes I look forward to eating Thanksgiving day. With every bite it takes me back to my childhood when I would watch her in the kitchen make her classic stuffing (or dressing ask she would call it). I would sneak small handfuls of dried croutons until she would cut me off because I would have eaten through the entire bag like potato chips if she hadn’t. Before she stuffed the bird, I would swipe a spoonful of the uncooked stuffing and turn to her making sure she knew I approved -this always made her smile.
My mom is 91 years old now, but through the years, when I was a kid, the best thing about Thanksgiving was the stuffing. Hers was the best I ever ate. Loaded with flavor and completely delicious. When I got married and started my own family, I made sure I had this recipe in my recipe box. I’ve used it all my life.
To me her recipe is nostalgic, old-fashion, and oh so good. In years past I’ve made plenty of stuffing variations with dried fruit, nuts, apples, sausage, and different breads. As much as I enjoy these other types of stuffing, it’s my mom’s recipe I keep coming back to. It’s so simple, perhaps this is why I love it… not to mention I feel so connected to mom when I make it. Stuffing is one of those types of dishes you can’t really screw up. If you’re looking for a great, flavorful but simple stuffing to serve your family and friends on Thanksgiving day, this (oldie but a goodie) recipe is for you! Enjoy!
Ingredients
1onion, diced
1green pepper, diced…
To Find Out All The Yummy Ingredients And The Step By Step Directions To Follow for this Delicious recipes,Go to the next page.
Ingredients
1onion, diced
1green pepper, diced
1 cbutter
3/4 cdiced celery (celery seed can be used, maybe a teaspoon or so)
2eggs, beaten
2 ccanned chicken broth
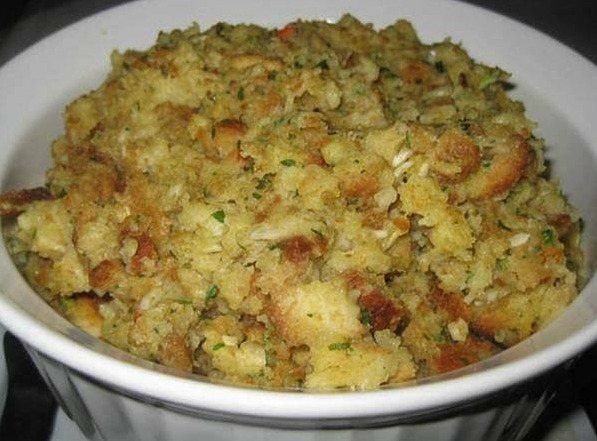
116 oz. bag of pepperidge farm herbed seasoned stuffing (is crumbs, not cubes or croutons and is sold in a blue & white bag)
116-20 oz. bag soft bread cubes
garlic
poultry seasoning
fresh parsley or dried parsley flakes
1/2 tsporegano
1reynolds turkey sized baking bag
Directions
In large bowl, combine the bag of bread cubes with Pepperidge Farm herbed seasoned stuffing.
In fry pan:
Melt butter over a medium high heat. Sautée onions, green pepper and celery (or celery seed) until all is softened and translucent.
Pour melted butter and vegetables over all bread cubes and crumbs.
Mix in the two beaten eggs. Toss.
Add:
1 tsp. Garlic Powder
1 tsp. Poultry Seasoning
2 Tablespoons Dried Parsley
1 Tsp. Oregano
Toss again.
Now pour chicken broth over all of mixture, making sure that stuffing is ALMOST wet, (you want it to be more than damp, but not downright wet) so that stuffing doesn’t dry out while inside turkey baking. (You can judge if stuffing is becoming too wet, just reserve the rest of the broth if not needed). (Many people like to use milk, but I find that it causes it to have a bland flavor. The chicken broth is the secret to excellent flavor, here.)
Continue to the Next Page …
Now pour chicken broth over all of mixture, making sure that stuffing is ALMOST wet, (you want it to be more than damp, but not downright wet) so that stuffing doesn’t dry out while inside turkey baking. (You can judge if stuffing is becoming too wet, just reserve the rest of the broth if not needed). (Many people like to use milk, but I find that it causes it to have a bland flavor. The chicken broth is the secret to excellent flavor, here.)
Toss once again, making sure all bread is well coated with all ingredients.
Stuff the turkey, packing tightly, but not too tightly, (as in “don’t really jam it in there”) at both ends. (If you have any left over, you can put it in a casserole dish, and refrigerate until 45 minutes before turkey is done, then put in oven with turkey for extra stuffing)
Use softened butter, and using fingers, rub butter all over turkey until coated, and then shake a little paprika over top of entire turkey.
Put about 2 tablespoons flour inside baking bag before putting the turkey inside. Push turkey into bag,close bag tightly, make three slits across the top of the bag for ventilation, and put into roaster pan. Put lid on roaster, and then bake, following instructions for the size turkey you have. (**Note: the baking bag will probably cut baking time by at least 3/4 hr. to one hour, but really holds in the juices and turkey stays very moist and juicy.)
No basting is required when you use the baking bag, but if you wish, you can baste one or two times during baking.
**Note**: Be sure to remember to make the slits in the top of the baking bag, maybe an inch or two long, and be sure to put the little bit of flour into the bottom of the bag before you put the turkey inside. When finished, you will have an ample supply of broth inside the bag to make your gravy. Simply use a cup or ladle to scoop it all out.
(What broth I don’t need, I always put into a plastic container and freeze to use when I make my chicken soups. I add it into the pot of soup and it gives my soups added extra special flavor!)
Source : justapinch.com