

I would classify this project as having a moderate level of difficulty, primarily due to the physicality involved. Each cinder block weighs approximately 35 pounds, and throughout the process of cleaning, priming, and painting, you will be working with them on the ground.
This positioning makes it challenging to lift the blocks using proper leg leverage. Instead, you will find yourself bending more than lifting and moving, placing a significant strain on your lower back muscles.
However, once you reach the assembly stage of the bench, the task becomes somewhat easier. At this point, you can utilize your legs more effectively to assist with lifting and maneuvering the blocks.
Materials Note:
When working with cinder blocks for this project, pressure-treated wood is not necessary unless you choose not to paint the blocks. If you decide to skip the painting step, it is recommended to use pressure-treated 4x4s to help prevent rotting. However, for painted blocks that will be in contact with the ground or exposed to constant moisture, pressure-treated wood is not required. Keep in mind that if you choose not to use pressure-treated wood, it may take some time for the blocks to dry thoroughly before staining.
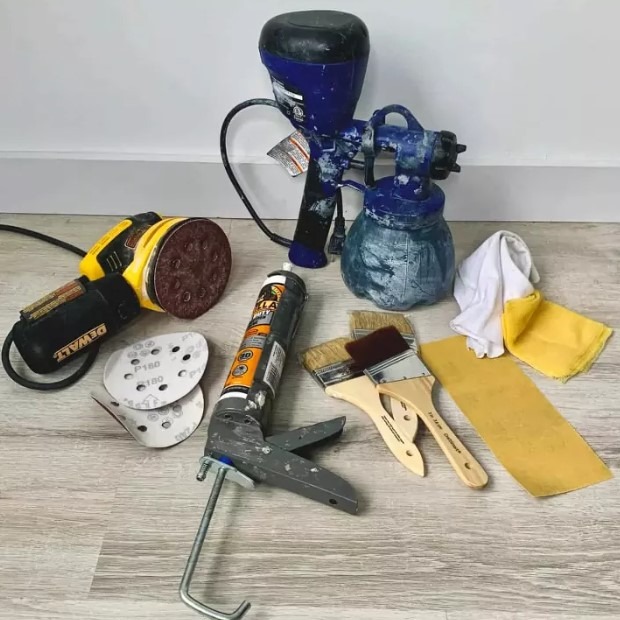
As for painting, while using a sprayer can save time, it tends to waste more paint. Using a roller or brush is just as effective. In fact, a combination of both can be helpful, with the brush being particularly useful for reaching inside the block’s holes.
If you have specific space requirements, it’s essential to note that a standard cinder block is listed as measuring 16x8x8, but its actual dimensions are closer to 15 ⅝” x 7 ⅝” x 7 ⅝”. The interior holes have a minimum size of 5×5″, while the 4x4s you’ll be using will measure about 3 ½” x 3 ½”.
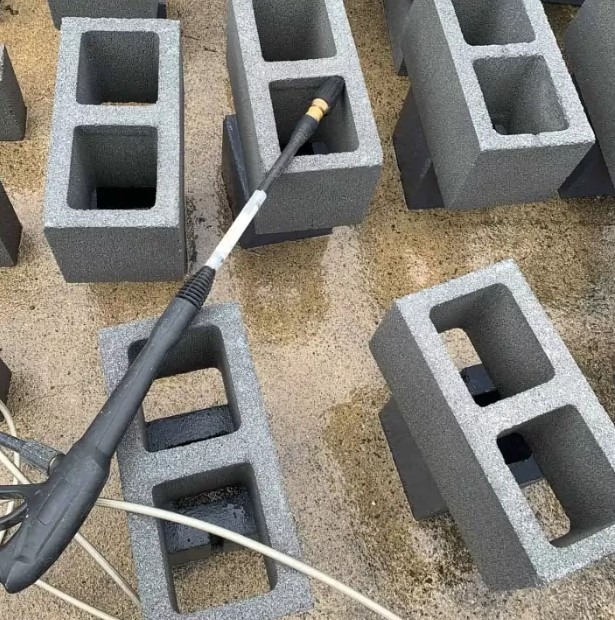
For cleaning the blocks, a power washer is ideal, but if you don’t have one, a bucket and a nylon scrub brush will suffice.
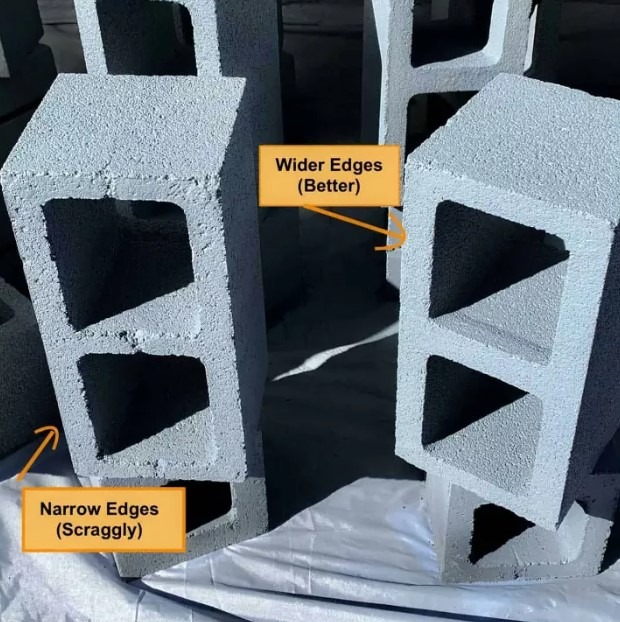
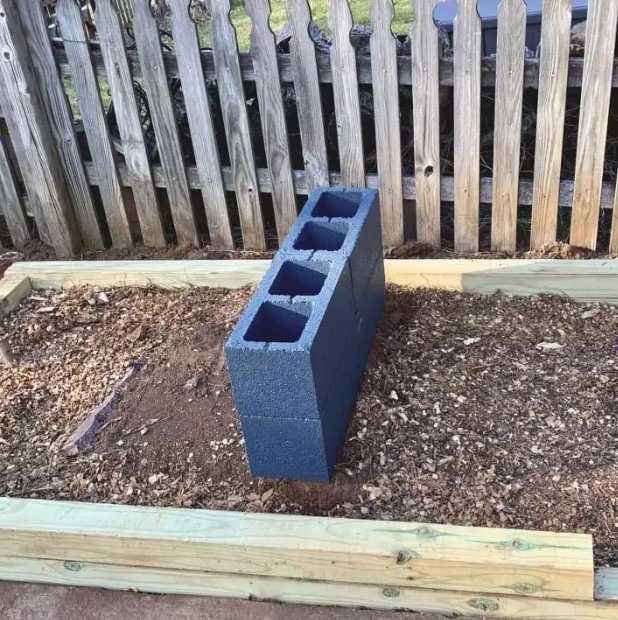
Keep in mind that standard cinder blocks are designed to be stacked horizontally. Each side of the block has slightly different characteristics around the hole openings. One side features longer holes and thinner edges, while the other side has shorter openings and thicker, cleaner edges. Consider the aesthetic appeal when assembling the bench, as these edges will be referenced in the following steps.
Timing:
For optimal results, it’s ideal to set aside 3-4 consecutive rain-free days if you are working on this project outdoors. While it can be completed in three days, it requires careful attention to timing.
During the process, you will need to consider drying times after washing the blocks, as well as priming, flipping the blocks, painting, flipping again, and repeating for an additional coat.
Why Paint the Cinder Blocks?
Painting the cinder blocks is highly recommended as it helps preserve the wood posts. By applying paint to the blocks, you effectively waterproof them.
If the blocks are left unpainted, they will absorb water, causing the wood posts to remain in constantly wet conditions whenever it rains.
Even if the posts are stained and coated with urethane, they will be more susceptible to rotting without painted cinder blocks. On the other hand, painted cinder blocks dry more quickly and help wick away moisture, providing better protection for the wood posts.
How to Make a Cinder Block Bench Step by Step Tutorial
Step 1. Wash The Cinder Blocks
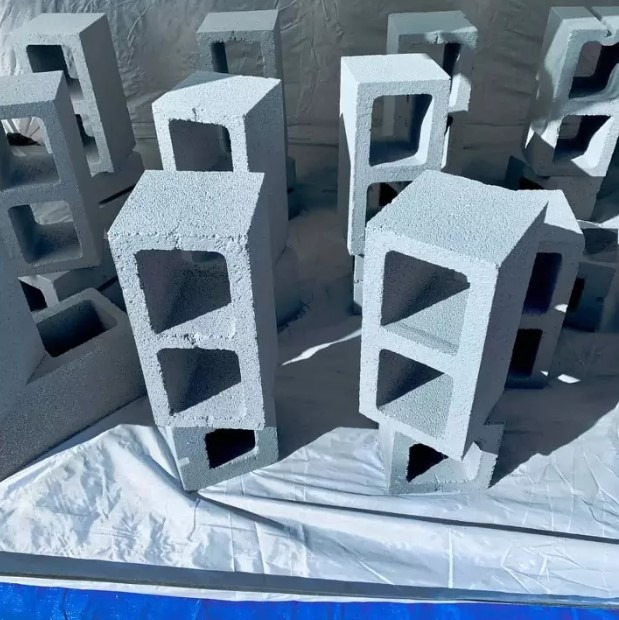
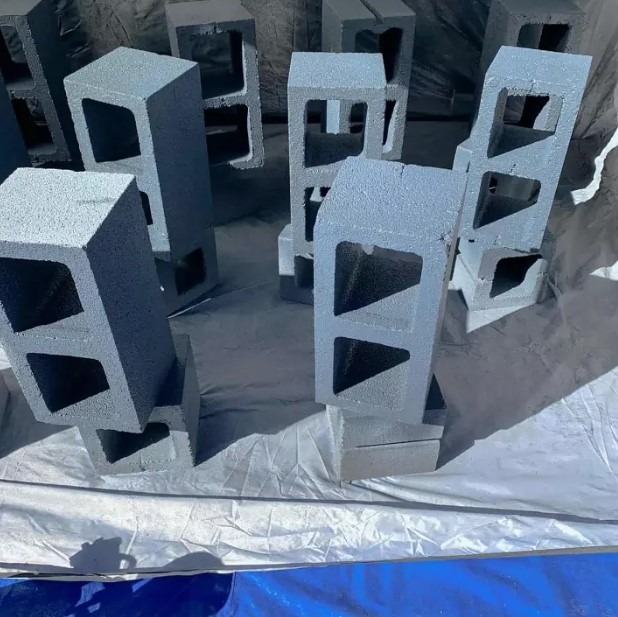
To ensure the cinder blocks do not sit directly on the ground, it is recommended to place them on top of an elevated surface. This prevents them from coming into contact with dirt, allowing for quicker drying.
If you have square cinder blocks from a previous project, you can use them to elevate the blocks.
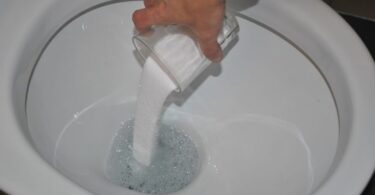
For cleaning the blocks, you can add TSP (trisodium phosphate) to the soap canister of a power washer, or in case of hand washing, fill a 2-gallon bucket with water and add ¼ cup of TSP. Use a scrub brush to help remove dirt and oil.
After washing, allow the blocks to dry in the sun for at least a day, making sure to flip them at least once. It is crucial for the blocks to be completely dry before painting, as wet blocks can cause the paint to peel.
The drying process may take longer than a day, especially if the weather is not sunny. Wind can aid in speeding up the drying time.
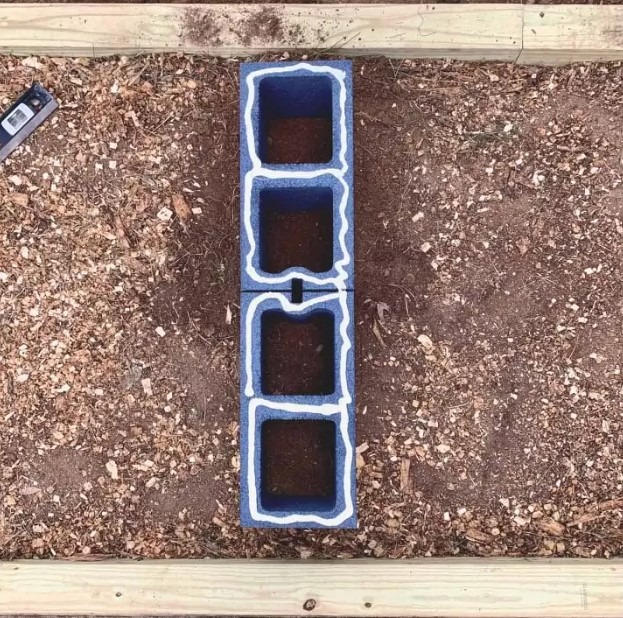
In the accompanying photo, you may notice concrete blocks as well. As mentioned earlier, those blocks are intended for the upcoming planter box add-ons.
Step 2. Prime And Paint The Blocks
Spray a coat of primer onto the blocks. Make sure to thoroughly coat the cinder blocks so the pores are filled, also don’t forget to get inside the holes.
Refer to the manufacturer’s label for specific recoat times, but typically, you should be able to flip the blocks after an hour, and under ideal conditions, the recommended time for recoating is approximately 4 hours.
After 4 hours, if the blocks feel dry and are not tacky, you can proceed to apply the first coat of paint.
If you don’t have a paint sprayer, you can use a paintbrush to prime and paint the blocks instead.
If you are using the same acrylic exterior paint as recommended in the materials list, the recommended time for recoating is approximately 4 hours.
Therefore, if the paint feels dry and is not tacky after 4 hours, you can proceed to apply the second coat of paint. Depending on the coverage and desired finish, you may need to apply a third coat.
If you notice any lighter spots still showing through, it is advisable to apply a third coat to achieve a more uniform appearance.
Step 3. Sand And Stain The 4x4s
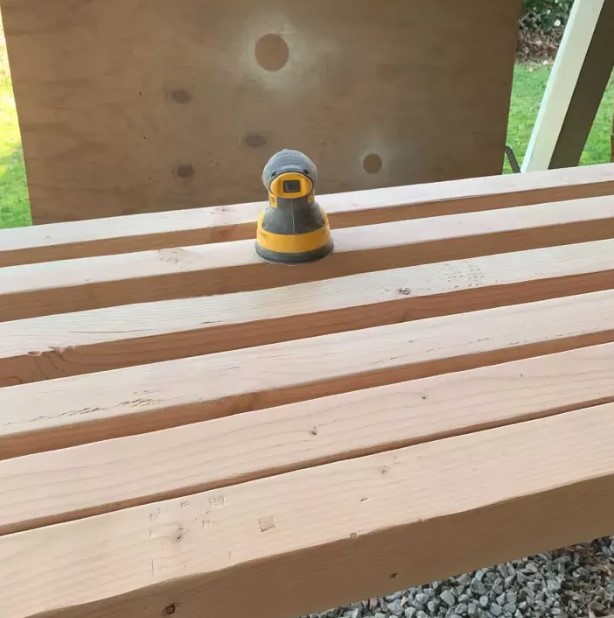
First sand all of the 4×4’s using an orbital sander and 220 grit paper, and then wipe them down with a lint-free cloth.
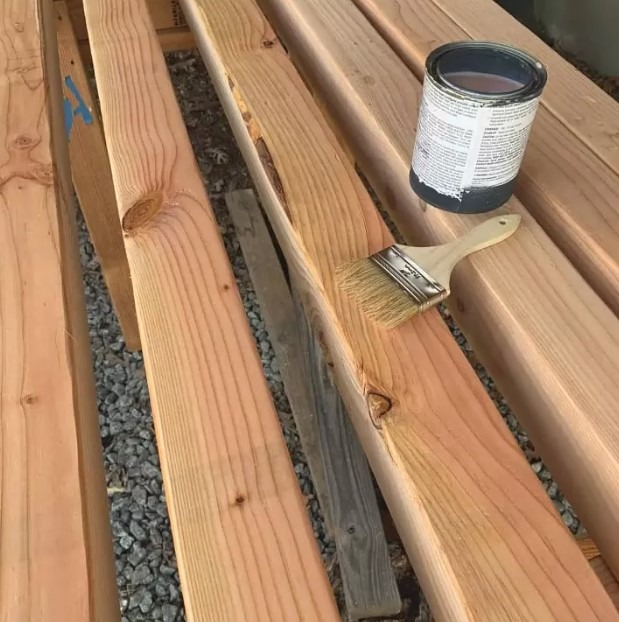
Afterwards, take a paintbrush and apply the wood conditioner, ensuring to remove any excess. Allow the conditioner to sit for 15-30 minutes.
If you come across any raised areas, gently sand them by hand using grit sandpaper.
To provide you with a time frame, I was able to cover one side of all 6 boards. At the halfway point, set a timer for 15 minutes, and you should have approximately 10 minutes remaining.
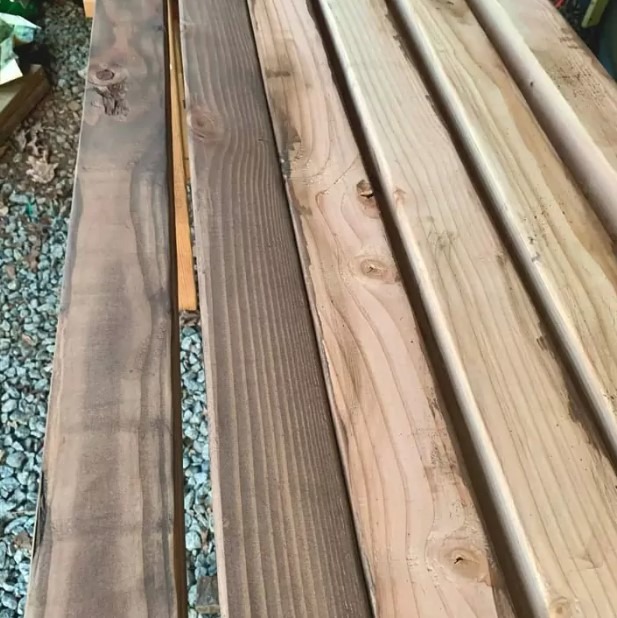
Now, using a brush, apply the wood stain to the surface. It’s important to avoid applying too much at once, so periodically wipe down the stain with a rag after a few minutes.
To maintain a systematic approach, I recommend covering one side of a 4×4 at a time, followed by wiping it down before moving on to the next side. Once all six sides are stained, flip each board and repeat the staining process.
If you’re new to staining or need a refresher, I suggest watching a helpful and concise YouTube video on how to stain wood.
After applying the stain, allow it to dry completely. Follow the label instructions, but as a minimum guideline, wait for at least 2 hours. Once the stain is dry, seal it with a clear water-based exterior urethane.
Step 4. Lay Out The Foundation For The Concrete Block Bench
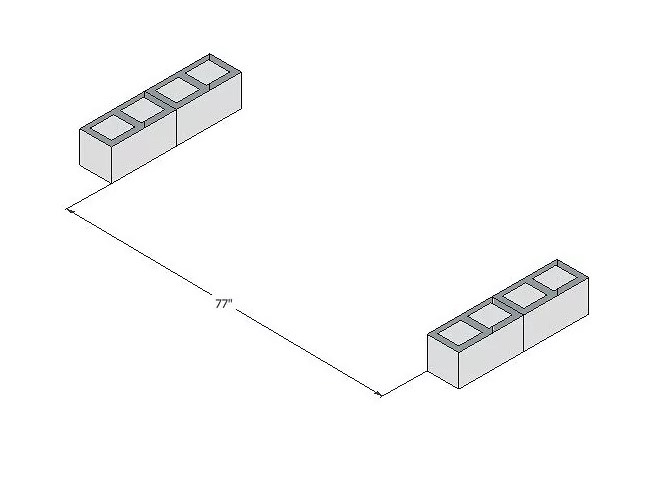
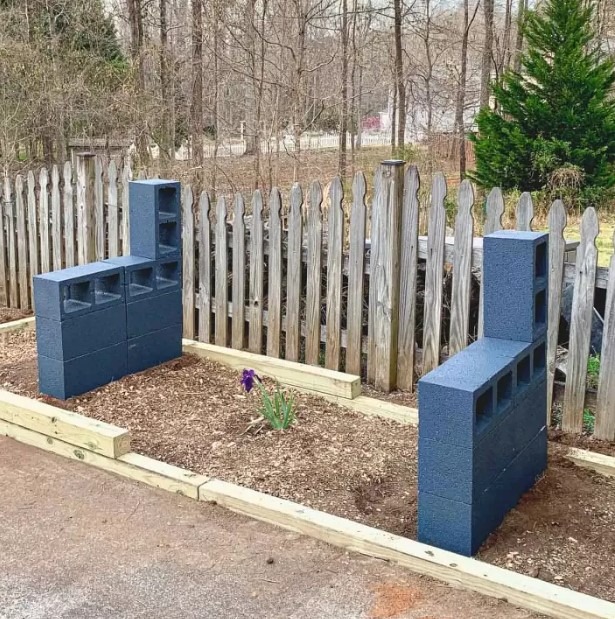
Begin by arranging the first set of four blocks at the desired distance for the length of the bench seat. Place two blocks stacked on each side, ensuring that the holes are open at the ground and facing towards you when viewed from above.
For my bench base, I positioned it with a measurement just under 77″ from the left base leg to the right (measured from the inside of each block). This measurement allowed for a 3″ overhang of the posts on each side once the bench was completed.
The deliberate 3″ overhang was chosen to accommodate the upcoming planter box add-ons in part two of this series.
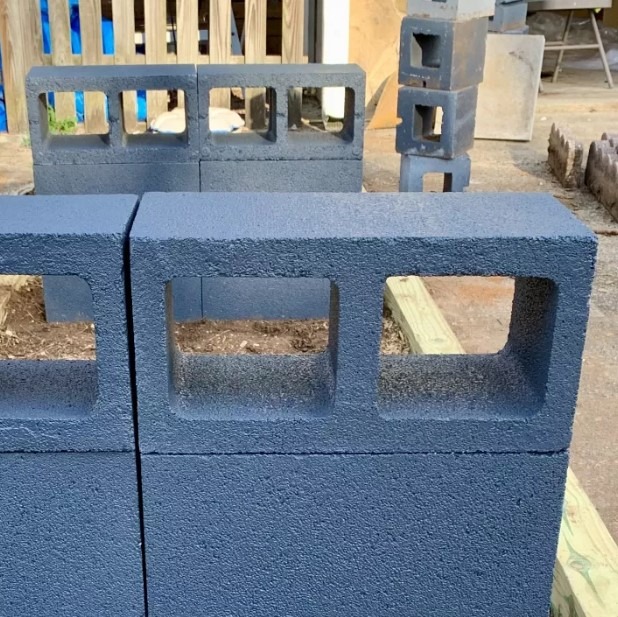
As mentioned in the materials note, when looking from the top down at the holes, each cinder block has one side with narrower holes and wider edges (the more aesthetically pleasing side). Conversely, the other side has wider holes with narrower edges (appearing slightly rough). Ensure that you lay the blocks with the wider side facing up. This provides a larger surface area for gluing and enhances the overall appearance.
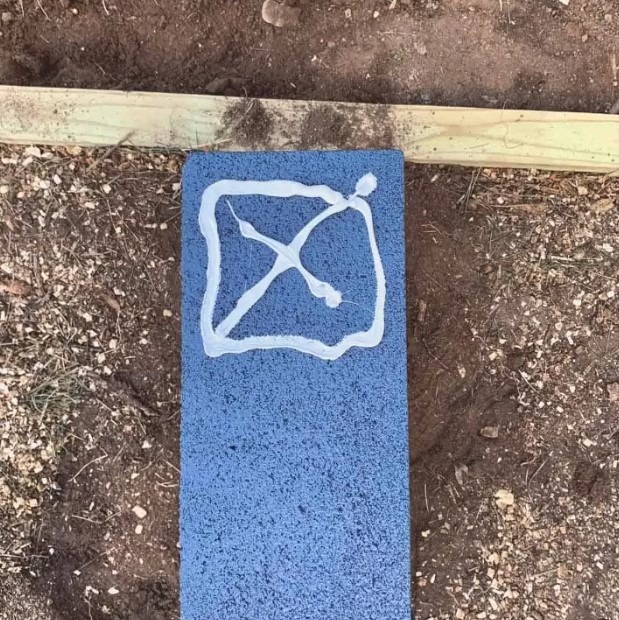
Using the construction adhesive, apply a line of glue along the edges of the cinder blocks. Be mindful to position the glue slightly closer to the inside, as placing it in the middle may cause it to overflow and become visible on the outside.
Repeat the same process on the other side of the blocks.
Next, add two more blocks on top of the glued bottom blocks, on both the left and right side.
Again, be sure to place the wider side on top of the glue since it has more surface. The skinner side will be facing you.
Step 5. Secure The Seating Blocks To The Base

Before proceeding with gluing, ensure that everything is properly aligned. Take the four side-facing blocks and position them on each side of the base, ensuring that the holes are facing sideways.
Next, insert four of the 4x4s into the holes to check if the bench seating is straight and level. If everything appears to be in order, proceed with gluing the seat blocks to the base. However, if any adjustments are needed to achieve proper alignment, make those adjustments before applying the glue.
For gluing the seating blocks in this step, follow a similar process as before. However, this time you can apply the glue to the narrow edges of the blocks.
Since the seating blocks are positioned on their sides, you have the entire surface area available for the glue to adhere to.
Additionally, ensure that the wider edges with the better-looking holes are facing outward, while the narrow edges will face inward. This arrangement also provides a convenient armrest feature.
Step 6. Glue The Back Support Cinder Blocks To The Seating Blocks
Add glue at the back of the block at the back and then place a block sitting in a vertical position.
Don’t put any glue past the middle point, stay within the end of the hole.
Alternatively, if you’re unsure about the placement of glue, you can simply apply it to the end of the back support block. Then, position the block vertically on top.
Step 7. Assemble the Cinder Block Bench Seating and Back Posts
Make sure to allow the glue enough time to dry until it becomes tacky before inserting the posts into the holes. Generally, 10-15 minutes should suffice.
Consider the desired orientation of the posts, as certain sides may have a more appealing appearance due to the grain and knots. Gently insert each post into the holes, maintaining equal spacing on both ends.
It’s recommended to wait for 24 hours before testing out the bench seating. This is because the glue needs time to fully cure, and the blocks may shift if the glue is still wet and subjected to added weight.
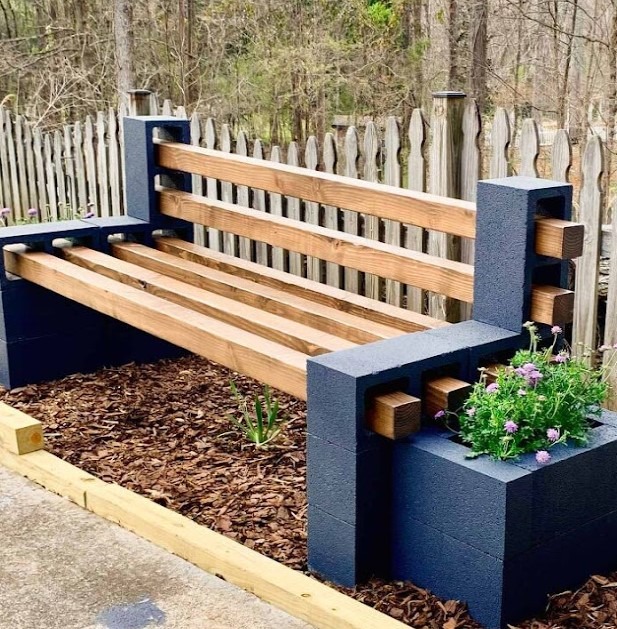
Feel free to enhance the comfort and ambiance of your cinder block bench by adding seat cushions and decorative pillows. Enjoy your wonderful creation!